Final Image Preview
Before we get started, let's take a look at the image we'll be creating. Below is the completed illustration to see what you're working toward. If you would like to download Inkscape, go to inkscape.org. If this is your first time using Inkscape, I recommend that you complete a few of the tutorials that come bundled with Inkscape first to get the hang of how the program works (available from the Help menu).

Step 1
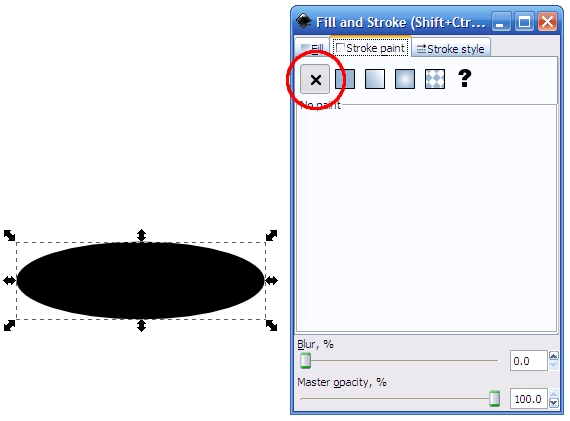
Begin by opening up a new document in Inkscape. Let's start by making the saucer that the coffee cup rests on. The saucer will be comprised of five different ellipses, so get ready to draw. Select the Circle/Ellipse tool (F5) from the Toolbox. Then draw an ellipse about the proportions of the one in the picture below.
Now we need to change the fill and stroke (outline) colors, so select your ellipse and open up the Fill and Stroke dialog window by going to Object > Fill and Stroke (Ctrl + Shift + F). On the Stroke paint tab click the "X" button to eliminate the outline on this shape.
Step 2
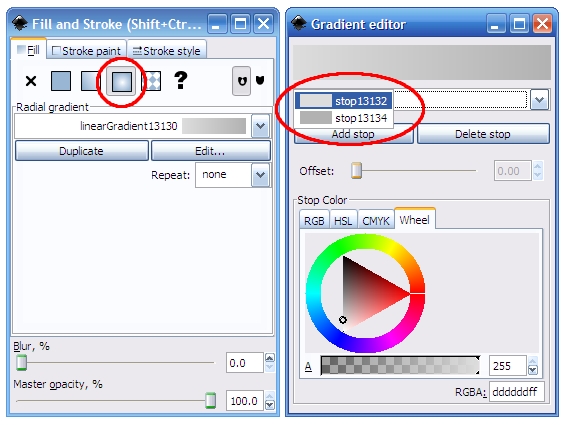
Now we want to fill the ellipse with a radial gradient. We'll be doing quite a few radial and linear gradients in this tutorial, so pay close attention if you've never done this in Inkscape before. On the Fill tab (still in the Fill and Stroke window), click the Radial Gradient button. Inkscape automatically fills your shape with a gradient - normally fading to transparent by default.
We want a gradient with two shades of gray, so click the Edit button underneath the gradient. Now you can edit the gradient's Color Stops and their Transparency. Set the first Stop to a light shade of gray (ddddddff). Set the second Stop to a darker shade of gray (b2b2b2ff). Make sure the Transparency for both colors is set to Opaque (no transparency).
Step 3
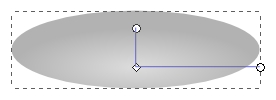
The next thing you need to do is adjust the size and center of the gradient relative to your ellipse. Drag the gradient handles on the ellipse to match the picture below. Note: If the gradient handles are not visible, simply click the Create and Edit Gradients button from the Toolbox (Ctrl + F1). Now you've completed one ellipse and you know how to create and edit gradients. The following steps won't be quite as detailed.
Step 4
The other ellipses in the saucer aren't quite as difficult to make. The next ellipse will form the white lip around the plate. The easiest way to make this is to duplicate the ellipse you just made by going to Edit > Duplicate (Ctrl + D). Then fill it with a very light gray color (f2f2f2ff) from the Fill and Stroke window. Then lower it just a few pixels lower than your first ellipse, and place it behind the first ellipse by going to Object > Lower.
Note: Press F1 (or hit the Select and Transform Objects button from the Toolbox) to move objects around with the mouse or arrow keys in Inkscape. It's hard to see the light gray ellipse, so I put a dark background behind it to make it easier to see in the screenshot below.

Step 5
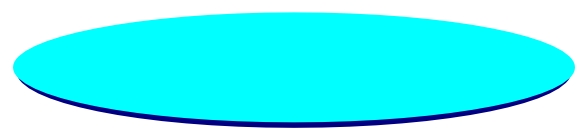
Now for the dark gray base of the saucer. Once again, duplicate one of your existing ellipses. Now fill it with another radial gradient with two very dark shades of gray (2b2b2bff and 666666ff). Then move the center of the gradient down to the bottom of the ellipse. The base of the plate doesn't need to be quite as wide as the rest of the plate. Press F1 and push the left and right sides of the ellipse in a little bit to "squish" it some.
Note that if you hold down Shift while dragging one of the edges, you can move both sides equally at once. Also, stretch the bottom of the ellipse down just a little bit to get the curve of the bottom of the saucer just right.
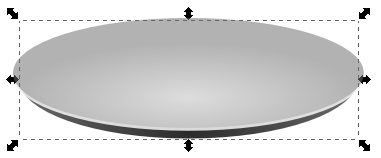
Move the whole ellipse down a few pixels and press the Page Down button a few times to place the ellipse below the other two. You should end up with something that looks like the image below. Note the proportions of the bottom ellipse (selected) compared to the other two. The saucer is starting to take shape!
Step 6
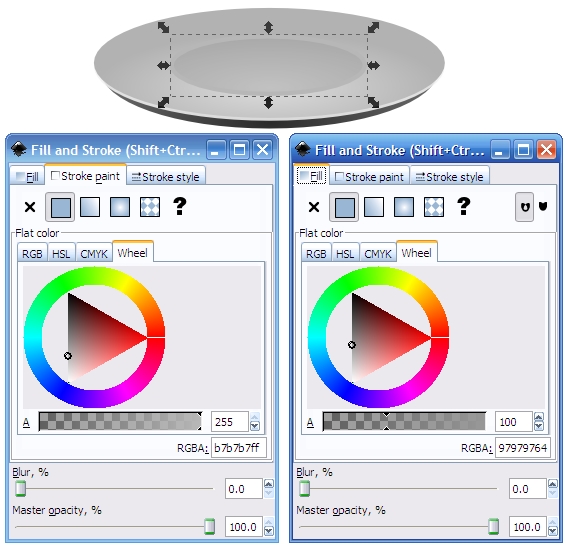
Now we need to create the center of the plate. Draw a smaller ellipse as shown in the image below (or select the topmost ellipse and scale it down). Open up the Fill and Stroke dialog (Ctrl + Shift + F). Then fill it with a flat gray color (979797). Drag the Alpha slider below the color wheel to 100.
Give it a stroke color of b7b7b7 (full opacity). On the Stroke style tab set the width to match the picture below. The actual size of the stroke will vary depending on how big you drew your ellipses. For me, it was 3px, but you may end up with something different.
Step 7
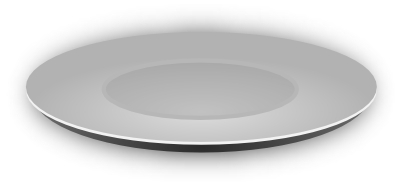
The plate is almost finished now. The last step is to add a blurry drop-shadow. Duplicate the bottom-most ellipse (the dark gray base). Then blur it 10% (from the bottom of the Fill and Stroke window). Place it below all the other objects.
You now have a finished saucer! You may choose to group the five ellipses to make them easier to select later on. Just highlight them all and press Ctrl+G. Now, on to the coffee cup itself!
Step 8
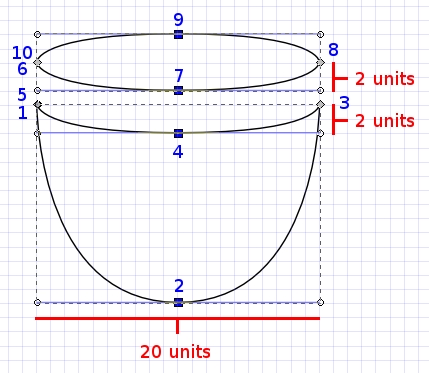
We'll begin by drawing two shapes with the Bezier Curves tool (Shift + F6). Make one for the face of the coffee cup and one to form the outer rim of the cup. These shapes need to match up in width and the amount of curve. I recommend that you turn on the grid to help you draw these lines (Shift + #). Also note, Click to create a point, click and drag to create a curve.
I actually drew these shapes in place on top of each other, but I separated them in this screenshot to show how I drew the shapes and their curves. Notice that both shapes and their curve lengths are 20 units wide. Also, notice how the bottom of the rim matches the top of the cup face; They are both 2 units deep. For guidance, the numbers in blue show the order in which I created the points/curves.
Step 9
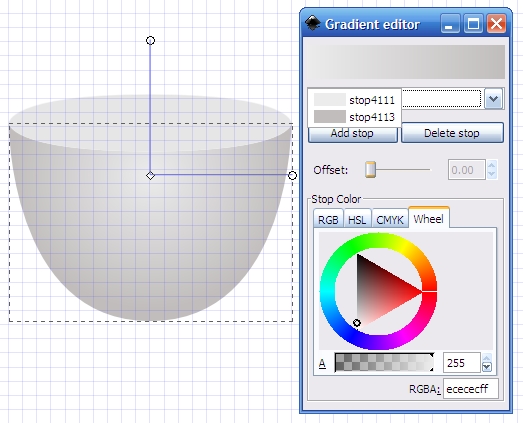
With the grid still on, place the rim directly on top of the cup face. Eliminate the stroke from both shapes. Fill the rim shape (that looks like an ellipse) with a solid color gray (e6e6e6ff). Fill the cup face with a radial gradient that goes from ecececff at the center to bdbdbdff. Then place the center of the gradient near the top of the cup shape, as shown below.
Step 10
Duplicate the rim shape and scale it in a little bit to form the width of the rim. Give this shape a thin gray stroke (d6d6d6ff) and a radial gradient from ecececff to bdbdbdff. Then drag the gradient handles to match the picture below.
Step 11
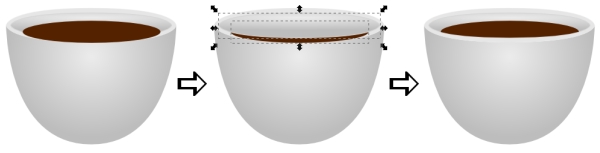
The next step is to create the coffee inside the cup. We obviously want to create a shape that gives the appearance of the coffee being inside the rim. To do that we'll have to create an ellipse for the coffee and intersect it with the inner rim.
Here's how to do it. Create an ellipse like the brown one in the picture below. Then set it on top of the rim. Then, duplicate the ellipse that makes up the inner portion of the rim. Then select both the duplicated ellipse and the one you just drew. Now go to the menu and choose Path > Intersection (Ctrl + *).
You should end up with a shape that looks like coffee in a cup. Now you can fill it with a radial gradient using any two (or more) shades of brown.
Step 12
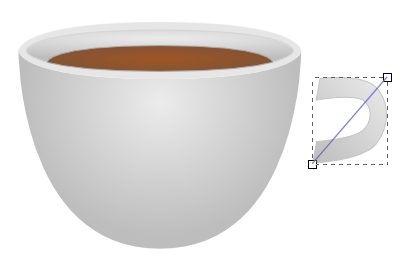
Creating the handle for the coffee cup is a cinch. Use the Bezier tool to make a shape similar to the handle shown below. Give it a thin light gray stroke and fill it with a linear gradient from bottom left to top right using two shades of gray (bdbdbdff and ecececff). Now place it behind the cup.
Step 13
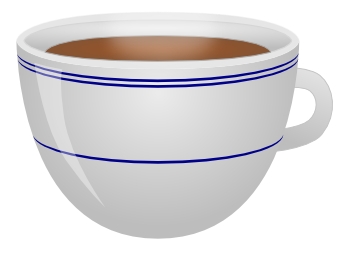
To give our cup some personality, we're going to add some blue stripes around it. The way to do it is a little trickier than meets the eye. You can't simply draw a line, because the end of the line would never match up with the edge of the cup, as shown below.
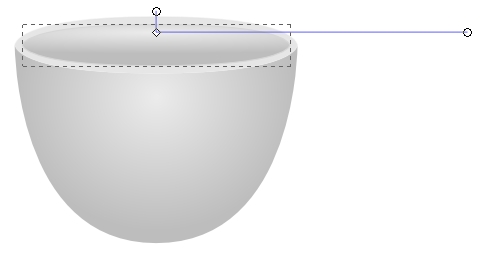
Step 14
So here's the method I came up with that worked quite well. Create an ellipse with about the same proportions as the coffee cup rim. Then fill it with any color (no stroke). Now duplicate that ellipse, place it below the first one, and pull the bottom drag handle down a little bit. Then push the sides in some too. I colored my ellipses two different colors so you can see how this should look.
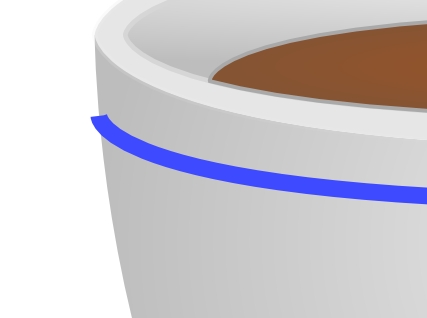
Step 15
Select both ellipses and choose Path > Difference (Ctrl + Minus Sign) from the menu. Presto! You now have a beautiful vanishing curve. Fill your new shape with whatever color you prefer. Duplicate it as many times as you want. Then place it on top of your coffee cup wherever you choose.

Step 16
Let's create a reflection on the side of our cup. Draw a shape with the Bezier tool like the one in the screenshot below. Color it white and drag the alpha slider to about 90 so that it's transparent. Place it on top of the cup face and colored lines.

Step 17
Now for some steam. Begin by drawing a small white ellipse. Make it semi-transparent and blur the edges of it significantly. Place it above your coffee. This will give the general impression of heat and steam.
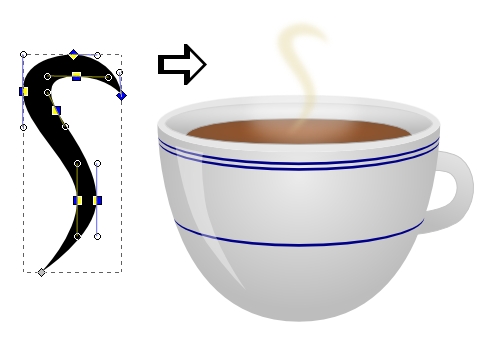
Step 17
Now let's create a wispy trail of steam. Create a shape with the Bezier tool like the one below. Color it a light brown or gold color, make it semi-transparent and blur it also. Play around with the Master Opacity and Blur settings until it looks just right.
Our coffee cup is finished! As with the saucer, you may find it handy to group all the shapes that comprise the cup.
Final Image
Let's place our finished cup on top of our saucer. Then add a small drop shadow underneath the cup. Simply draw a small black ellipse and blur it.
There you have it, a beautiful vector coffee cup and saucer created with Inkscape! I hope you enjoyed making this as much as I did. I also hope this tutorial proved informative in demonstrating the main features of Inkscape - an Open Source alternative for vector art. Enjoy!

0 comments:
Post a Comment